Installation
The release page has pre-compiled binaries for Mac OS X, Windows, Linux and FreeBSD . The Linux binary is a static executable that can be run on any Linux distribution.
You can also use your OS package manager.
You can install PostgREST from the Homebrew official repo.
brew install postgrest
You can install PostgREST from the official ports.
pkg install hs-postgrest
You can install PostgREST from the community repo.
pacman -S postgrest
You can install PostgREST from nixpkgs.
nix-env -i haskellPackages.postgrest
You can install PostgREST using Chocolatey or Scoop.
choco install postgrest
scoop install postgrest
Running PostgREST
If you downloaded PostgREST from the release page, first extract the compressed file to obtain the executable.
# For UNIX platforms
tar Jxf postgrest-[version]-[platform].tar.xz

# On Windows you should unzip the file
Now you can run PostgREST with the --help flag to see usage instructions:
# Running postgrest binary
./postgrest --help

# Running postgrest installed from a package manager
postgrest --help

# You should see a usage help message
The PostgREST server reads a configuration file as its only argument:
postgrest /path/to/postgrest.conf

# You can also generate a sample config file with
# postgrest -e > postgrest.conf
# You'll need to edit this file and remove the usage parts for postgrest to read it
For a complete reference of the configuration file, see Configuration.
Note
If you see a dialog box like this on Windows, it may be that the pg_config program is not in your system path.
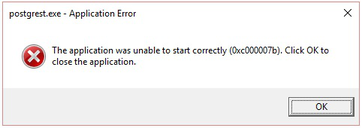
It usually lives in C:Program FilesPostgreSQL<version>bin. See this article about how to modify the system path.
To test that the system path is set correctly, run pg_config from the command line. You should see it output a list of paths.
PostgreSQL dependency
To use PostgREST you will need an underlying database. We require PostgreSQL 9.6 or greater. You can use something like Amazon RDS but installing your own locally is cheaper and more convenient for development. You can also run PostgreSQL in a docker container.
Docker
You can get the official PostgREST Docker image with:
docker pull postgrest/postgrest
To configure the container image, use Environment Variables.
There are two ways to run the PostgREST container: with an existing external database, or through docker-compose.
Containerized PostgREST with native PostgreSQL
The first way to run PostgREST in Docker is to connect it to an existing native database on the host.
# Run the server
docker run --rm --net=host \
  -e PGRST_DB_URI="postgres://app_user:password@localhost/postgres" \
  postgrest/postgrest
The database connection string above is just an example. Adjust the role and password as necessary. You may need to edit PostgreSQL’s pg_hba.conf to grant the user local login access.
Note
Docker on Mac does not support the --net=host flag. Instead you’ll need to create an IP address alias to the host. Requests for the IP address from inside the container are unable to resolve and fall back to resolution by the host.
sudo ifconfig lo0 10.0.0.10 alias
You should then use 10.0.0.10 as the host in your database connection string. Also remember to include the IP address in the listen_address within postgresql.conf. For instance:
listen_addresses = 'localhost,10.0.0.10'
You might also need to add a new IPv4 local connection within pg_hba.conf. For instance:
host all all 10.0.0.10/32 trust
The docker command will then look like this:
# Run the server
docker run --rm -p 3000:3000 \
  -e PGRST_DB_URI="postgres://app_user:password@10.0.0.10/postgres" \
  postgrest/postgrest
Containerized PostgREST and db with docker-compose
To avoid having to install the database at all, you can run both it and the server in containers and link them together with docker-compose. Use this configuration:
# docker-compose.yml

version: '3'
services:
  server:
    image: postgrest/postgrest
    ports:
      - "3000:3000"
    environment:
      PGRST_DB_URI: postgres://app_user:password@db:5432/app_db
      PGRST_OPENAPI_SERVER_PROXY_URI: http://127.0.0.1:3000
    depends_on:
      - db
  db:
    image: postgres
    ports:
      - "5432:5432"
    environment:
      POSTGRES_DB: app_db
      POSTGRES_USER: app_user
      POSTGRES_PASSWORD: password
  # Uncomment this if you want to persist the data.
  # volumes:
  #   - "./pgdata:/var/lib/postgresql/data"
Go into the directory where you saved this file and run docker-compose up. You will see the logs of both the database and PostgREST, and be able to access the latter on port 3000.
If you want to have a visual overview of your API in your browser you can add swagger-ui to your docker-compose.yml:
swagger:
  image: swaggerapi/swagger-ui
  ports:
    - "8080:8080"
  expose:
    - "8080"
  environment:
    API_URL: http://localhost:3000/
With this you can see the swagger-ui in your browser on port 8080.
Building from Source
When a pre-built binary does not exist for your system you can build the project from source.
Note
We discourage building and using PostgREST on Alpine Linux because of a reported GHC memory leak on that platform.
You can build PostgREST from source with Stack. It will install any necessary Haskell dependencies on your system.
Install Stack for your platform
Install Library Dependencies
Operating System
Dependencies
Ubuntu/Debian
libpq-dev, libgmp-dev, zlib1g-dev
CentOS/Fedora/Red Hat
postgresql-devel, zlib-devel, gmp-devel
BSD
postgresql12-client
OS X
libpq, gmp
Build and install binary
git clone https://github.com/PostgREST/postgrest.git
cd postgrest

# adjust local-bin-path to taste
stack build --install-ghc --copy-bins --local-bin-path /usr/local/bin
Note
If building fails and your system has less than 1GB of memory, try adding a swap file.
–install-ghc flag is only needed for the first build and can be omitted in the subsequent builds.
Check that the server is installed:
postgrest --help.
Deploying to Heroku
Log into Heroku using the Heroku CLI:
# If you have multiple Heroku accounts, use flag '--interactive' to switch between them
heroku login --interactive
Create a new Heroku app using the PostgREST buildpack:
mkdir ${YOUR_APP_NAME}
cd ${YOUR_APP_NAME}
git init .

heroku apps:create ${YOUR_APP_NAME} --buildpack https://github.com/PostgREST/postgrest-heroku.git
heroku git:remote -a ${YOUR_APP_NAME}
Create a new Heroku PostgreSQL add-on attached to the app and keep notes of the assigned add-on name (e.g.
postgresql-curly-58902) referred later as ${HEROKU_PG_DB_NAME}
heroku addons:create heroku-postgresql:standard-0 -a ${YOUR_APP_NAME}
# wait until the add-on is available
heroku pg:wait -a ${YOUR_APP_NAME}
Create the necessary user roles according to the PostgREST documentation:
heroku pg:credentials:create --name api_user -a ${YOUR_APP_NAME}
# use the following command to ensure the new credential state is active before attaching it
heroku pg:credentials -a ${YOUR_APP_NAME}

heroku addons:attach ${HEROKU_PG_DB_NAME} --credential api_user -a ${YOUR_APP_NAME}
Connect to the PostgreSQL database and create some sample data:
heroku psql -a ${YOUR_APP_NAME}# from the psql command prompt execute the following commands: create schema api; create table api.todos ( id serial primary key, done boolean not null default false, task text not null, due timestamptz ); insert into api.todos (task) values ('finish tutorial 0'), ('pat self on back'); grant usage on schema api to api_user; grant select on api.todos to api_user;
Create the
Procfile:
web: PGRST_SERVER_HOST=0.0.0.0 PGRST_SERVER_PORT=${PORT} PGRST_DB_URI=${PGRST_DB_URI:-${DATABASE_URL}} ./postgrest-${POSTGREST_VER}Set the following environment variables on Heroku:
heroku config:set POSTGREST_VER=10.0.0
heroku config:set PGRST_DB_SCHEMA=api
heroku config:set PGRST_DB_ANON_ROLE=api_user
PGRST_DB_URI can be set if an external database is used or if it’s different from the default Heroku DATABASE_URL. This latter is used if nothing is provided. POSTGREST_VER is mandatory to select and build the required PostgREST release.
See https://postgrest.org/en/stable/configuration.html#environment-variables for the full list of environment variables.
Build and deploy your app:
git add Procfile
git commit -m "PostgREST on Heroku"
git push heroku master
Your Heroku app should be live at
${YOUR_APP_NAME}.herokuapp.com
Test your app
From a terminal display the application logs:
heroku logs -tFrom a different terminal retrieve with curl the records previously created:
curl https://${YOUR_APP_NAME}.herokuapp.com/todosand test that any attempt to modify the table via a read-only user is not allowed:
curl https://${YOUR_APP_NAME}.herokuapp.com/todos -X POST \
 -H "Content-Type: application/json" \
 -d '{"task": "do bad thing"}'